mercredi 1 octobre 2014

Victor An upholstered Chair/ Le Fauteuil


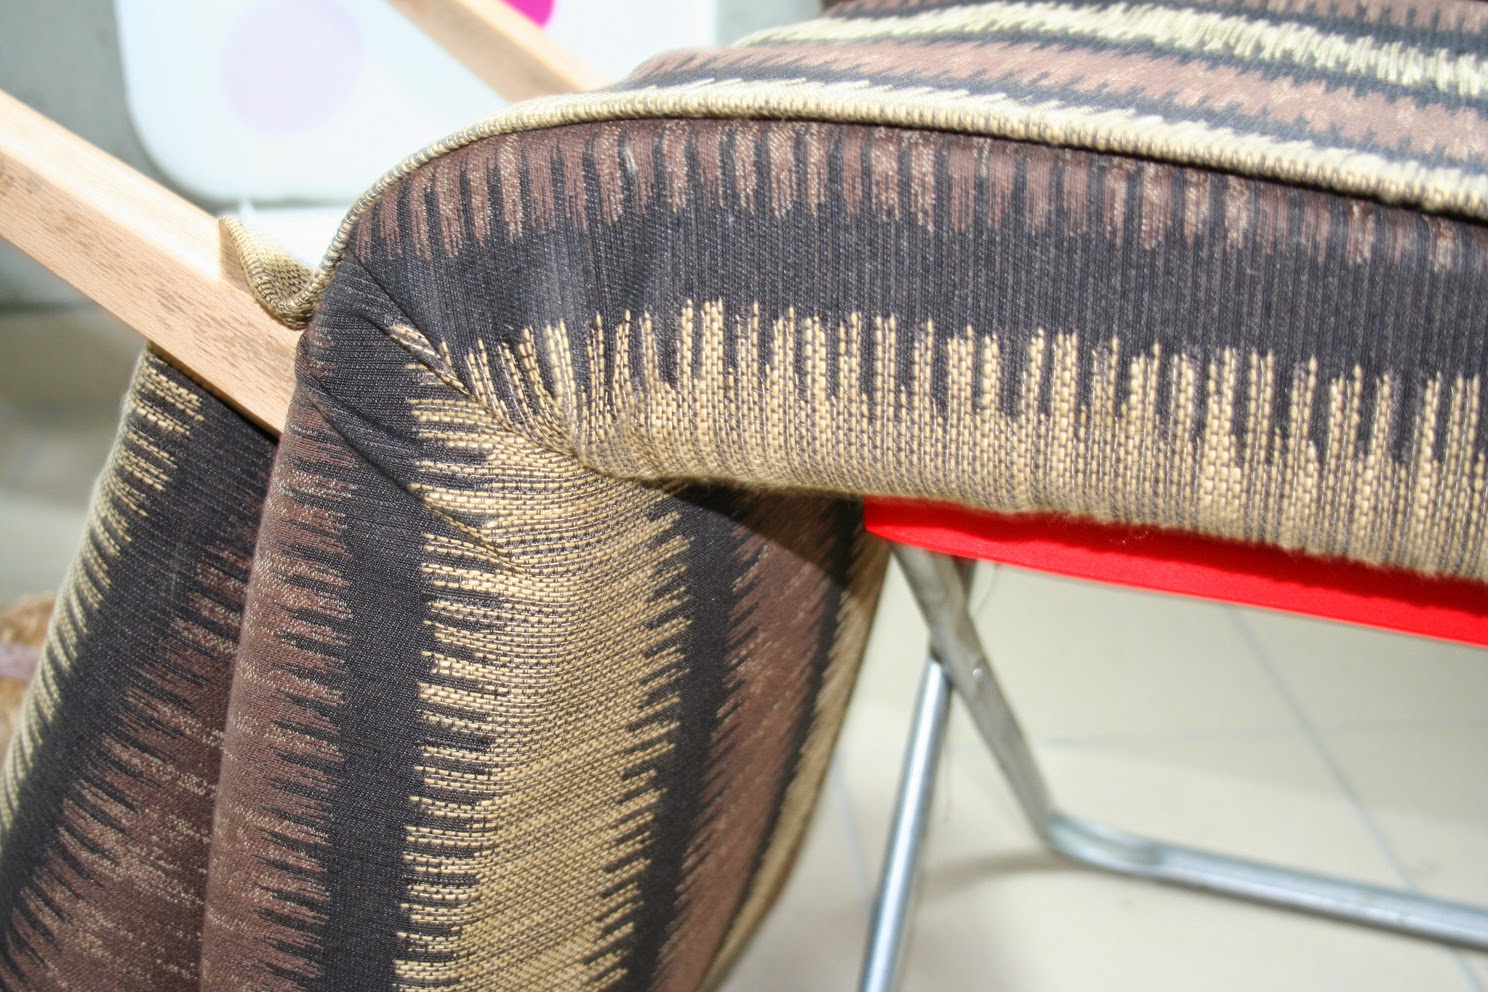
Un ami est venu me voir avec un problème. I adore une chaise qui appartenait à son père, mais celle-ci ne s'intègre pas du tout à son intérieur. Recouverte de skaï vert elle était moche et inconfortable, mais de forme intéressante. Cette chaise avait juste besoin d'un relooking. Alors nous avons choisi un tissus, et je me suis mise au travail! Huit heures plus tard, voilà!
A friend of mine came to me with a problem. He was very fond of this chair that belonged to her father, but it didn't suit his interior. The fake green leather was ugly and uncomfortable, but the shape was interesting. This chair just needed a little make-over. So we chose a fabric, and I started working! Eight hours later, voilà! 


Tout d'abord j'ai complètement enlevé le vieux revêtement et toutes les agrafes (et il y en avait un tas!!), laissant seulement la mousse qui était en bon état. J'ai commencé par recouvrir l'assise, en faisant attention que le motif du tissus soit bien aligné sur l'assise et le dossier. J'ai fait passer le tissus entre l'assise et le dossier. J'ai accroché le tissus en l'agrafant au cadre en bois du dessous de l'assise. J'ai plié le tissus dans les coins de façon identique des deux côtés. Puis j'ai fixé le tissus du dossier, en m'assurant que j'avais assez de tissus pour recouvrir l'arrière du dossier et le dessous de l'assise avec la même bande de tissus. Une fois que j'avais tout agrafé,  j'ai commencé la phase plus délicate du dos du dossier. J'ai soigneusement plié le tissus puis je l'ai collé. J'ai sécurisé en agrafant le reste du tissus en dessous de l'assise, en tendant bien pour éviter les plis, et en retroussant le tissus vers l'intérieur pour faire un ourlet et cacher les bords.  Ce projet était un vrai challenge, mais très gratifiant, maintenant j'adore ce fauteuil au style sophistiqué, comme mon ami! 
First I completely removed the old fabric and all the staples (and there was quite a lot!!), only leaving the foam which was in a good state. I started  covering the seat, making sure the fabric on the seat and the back would line up. I pulled the fabric through the gap between the back and the seat. I attached the fabric in place by stapling it onto the wood frame underneath the seating panel. I folded the fabric around the corners and made sure it looked even. Then I did the same for the back panel, making sure I had enough fabric to cover both sides of the back panel and the bottom of the seating panel with the same long piece of fabric. Once all the stapling was done, I moved to the more tricky stage of the back of the chair's back panel. I had to neatly fold the fabric and glue it into place, then finish securing it by stapling the bottom of the seat panel making sure the fabric was firmly pulled to avoid creases, and folding the edges of the fabric inwards to hide them. This was a challenging but rewarding project, I love the look of this chair now, it's quite sophisticated, just like my friend!




button1.jpg1

samedi 15 février 2014

Emilie Chaises cannées / Cane chairs

Emilie, une chaise

Emilie, a chair


Emilie, de la féminité, de l'élégance… dans une chaise.
Emilie, femininity, elegance… in a chair.

Quand j'ai trouvé ces chaises cannées elles étaient tellement abîmées qu'on ne pouvait même plus s'assoir dessus. Mais j'ai trouvé la forme intéressante: fine, rectangulaire, avec une assise un peu étroite mais un dossier haut. Le travail de bois tourné sur le haut du dossier m'a semblé original.
When I found those two cane chairs they were in a bad state. The seats were too damaged to be used. But I found their shape interesting: narrow, rectangular with a high back. The wood work on the top rail is unusual. 


J'ai retiré les restes de cannage de l'assise. J'ai légèrement poncé le bois de la chaise. Avec une brosse un fer j'ai frotté l'intérieur des fentes pour bien nettoyer. Ensuite j'ai fini par frotté l'ensemble de la chaise, dossier en cannage inclus, avec de la laine d'acier. Puis j'ai bien dépoussiéré.
I removed the broken cane from the seat. I lightly polished the wood of the chair. With a steel brush I cleaned the inside of the cracks. I finished by polishing the whole chair, even the rest of the cane, with steel wool, and dusting well.


J'ai passé une première couche de peinture d'accroche, puis après 24h de séchage, une couche de peinture mate blanche. Pour peindre le dossier j'ai utilisé un petit rouleau pour éviter d'empâter le cannage qui doit rester souple. J'ai poncé au papier fin pour lisser le bois, jusqu'à ce que la chaise entière soit toute douce. Ca y est, maintenant on attaque la patine, je vais commencer à m'amuser! J'ai choisi un gris légèrement bleuté de Deluxe Valentine qui s'appelle "lune cendrée".
I started with an undercoat of prime paint, then 24 hours later a coat of basic mat white paint. For the cane I used a small foam paint roller to keep the layer of paint very light. I lightly sanded with fine sand paper until the whole surface of the chair was smooth. Now onto the fun part, the patina! I chose a grey with a hint of blue from Deluxe Valentine called "lune cendrée". 

Mais une fois que j'ai ouvert le pot je me suis rendue compte que la teinte tirait plus vers le mauve, voire lavande… C'est tellement difficile de choisir une teinte sur un catalogue papier ou sur un écran, il arrive que les couleurs ne soit pas tout à fait fidèles à la peinture. C'est pour cette raison que j'aime bien créer mes propres teintes avec des colorants universels. Au moins on peut "traficoter" jusqu'à obtention de la bonne teinte! 
But once I opened the jar I realised that the colour wasn't what I expected, it had hints of purple, kind of lavender… It's so difficult to chose a colour on a piece of paper or on a screen, sometimes it's not the same as the colour of the actual paint. That's why I like creating my own tints with colorings at least this way I can "fiddle" until I find the right colour!

J'ai peint rapidement la chaise entière avec ce gris/violet, puis avant que la peinture ne sèche totalement, j'ai frotté avec un chiffon en polaire mouillé, pour retirer la peinture de couleur sur le relief et laisser apparaître le blanc du dessous. Il faut essayer d'avoir le geste qui imite la patine naturelle du temps. 
I quickly painted the whole chair with the grey, and before the paint dried, I rubbed off some paint with a wet cloth to bring out the white on the relief. The trick is to imitate natural wear and tare.


Une fois sec, j'ai passé une couche supplémentaire de patine noire pour assombrir la teinte violette et créer un contraste avec le blanc. Pour cela j'ai dilué du colorant noir à de l'eau. J'ai passé une couche légère au pinceau, puis avec un chiffon humide, j'ai frotté par endroit sur le relief pour faire ressortir le blanc. J'ai laissé sécher, puis j'ai vernis avec un vernis satiné incolore, pour sceller le travail. Voilà pour le travail de peinture, maintenant on passe à l'assise!!
Once the grey coat was completely dried, I added a coat of black patina to darken the colour and create a more dramatic contrast with the white. For the patina I mixed a few drops of black coloring with some water and applied a thin layer with a brush, then lightly rubbed with a cloth to remove it from the relief. I've let it dry completely then applied a layer of clear satin varnish to protect the patina. Done with the paint work, now onto the seat!


Pour l'assise j'ai découpé une planche d'aggloméré à la forme de l'assise. Pour cela j'avait confectionné un patron en papier. J'ai utilisé le rembourrage d'un vieux coussin que j'ai bien réparti puis enveloppé d'une toile épaisse que j'ai ensuite agrafée sur l'envers. J'ai décalqué des fleurs de lys pour faire deux pochoirs. J'ai peint directement ces motifs sur un joli tissus en lin avec une peinture gris foncé. Une fois sec j'ai bien frotté le tissus pour lui rendre sa souplesse et lui donné un aspect vieilli. Avec ce tissus imprimé j'ai recouvert mes deux assises en l'agrafant sur l'envers. J'ai fixé les assises avec des vis sur le dessous de la chaise.
For the seat I cut a wooden board to the right shape with a paper pattern. I used the foam stuffing of an old cushion that I placed evenly on the board, covered with a thick material then stapled on the other side. I created two stencils, and painted them with dark grey paint on a nice linen material. Once dried, I rubbed the material to give it a nice smooth feel and make it look aged. I covered the seats and stapled the back, then secured it into place by screwing it from the bottom.


Alors, vous en pensez quoi? Laissez-moi vos commentaire!
So what do you think? Please leave me a comment!

Quelques photos supplémentaires...
Some more photos...


Elizabeth and Co.

Furniture Feature Fridays


Tickled Pink at 504 Main


http://shabbyartboutique.com/2014/02/shabbilicious-friday-link-party-37.html
Mod Vintage Life
We Call It Junkin
Chic By You Wednesday Linky Party

jeudi 6 février 2014

Odessa Le Miroir The Mirror

"Odessa" 

Le Miroir The Mirror


Je vous présente Odessa, mon dernier projet. A l'origine faisant parti d'une coiffeuse, ce grand miroir en bois m'a interpellé par sa jolie forme.
Let me introduce Odessa, my last project. Originally part of a dressing table, this large wooden mirror's lovely shape appealed to me.

Première étape, léger ponçage. Puis une couche de peinture blanche mate classique. J'ai laissé sécher 24h, puis j'ai poncé pour lui donner un aspect usé en faisant apparaître par endroit le bois d'origine.
First step, I lightly sanded it. Then I applied one layer of classic mat white paint. I let it dry 24h, then distressed it with sand paper, revealing some of the original wood, and giving it an antique look. 


Je souhaitais mettre en valeur le travail du bois. Pour cela j'ai choisi de peindre la bande du haut d'une couleur différente, un vert clair presque turquoise. J'ai créé cette couleur en mélangeant des colorants universels à la peinture blanche. C'est une étape que j'adore! Quelques gouttes de jaune, quelques gouttes de bleu… c'est amusant de voir des couleurs apparaitre et se transformer…
I wanted to emphasize the wood work. So I painted the top detail with a different colour, a light green, slightly turquoise. I love this step! A few drps of yellow, a few drops of blue… it's so funny to see the colours appearing and changing...

J'ai choisi une teinte assez vive car la patine devrait la foncer. Pour la patine j'ai suivi la technique de Martine Missemer dans "Bois Peints de nos Campagnes" (ArteLibris 2008), une technique très simple et efficace. Dans un pot, mélanger une cuillerée à soupe de farine, une cuillerée à soupe de peinture brune, et une pointe de couteau de peinture noire. Mélanger avec un peu d'eau. Appliquer au pinceau et laisser sécher. Puis frotter avec un chiffon humide dans le sens du bois. La couleur foncée reste dans les fentes du bois mais s'efface sur le relief, mettant en valeur les formes travaillées du bois, et donnant un aspect ancien.
I chose a bright enough colour because the patina should darken it. For the patina I followed Martine Missemer's technique in "Bois Peints de nos Campagnes" (ArteLibris 2008). A very simple but effective technique. Mix one table spoon of flour, one table spoon of brown paint and a dash of black paint in a tub. Add a bit of water. Apply with a paint brush and let it dry. Then rub with a wet cloth. The darker colour remains in the gaps and cracks but is removed from the relief. This highlights the shapes of the wood work and gives the impression of an old piece of furniture.

Pour souligner l'élégance des formes du bois j'ai ajouté une touche dorée. Il me restait un spray de couleur dorée (de nos décorations de Noël maison). J'en ai pulvérisé sur un chiffon, puis légèrement effleuré les parties à dorer pour une finition dorée subtile. Je trouve que le doré s'accorde bien avec la couleur verte. J'ai fini par une couche de vernis pour sceller le travail.
To highlight the elegant shapes of the wood I added a touch of gold. I had a golden spray left over from our DIY Christmas decorations. I sprayed it on a cloth and lightly brushed it over the frame of the mirror for a subtle finish. I find gold and green a nice combination. I finished with a clear varnish.


Voilà, un joli miroir ancien à poser dans une chambre sur une commode, ou dans un salon sur une cheminée. Qu'en pensez-vous?
Voilà, a nice antique mirror to put on top of a dresser in a bedroom or on a mantelpiece in a living-room. What do you think?


Featured in:

MinettesMaze
Elizabeth and Co.

Put A Bird On It
We Call It Junkin